
When it comes to protecting your home, the quality of your door locks makes a significant difference. Lock installation is not just about fitting a piece of hardware onto your door, it is about ensuring the safety, convenience, and peace of mind of your family. Whether you are a first-time homeowner upgrading your security or someone replacing old locks, knowing how to install and maintain your locks properly is essential.
In this step-by-step guide, we will cover everything from choosing the right lock to installing it, testing it, and maintaining it for long-term use. By the end, you will have a clear understanding of the lock installation process and the best practices to keep your locks working smoothly for years.
Why Proper Lock Installation Matters
Many homeowners underestimate the importance of professional or careful DIY lock installation. A poorly installed lock can:
- Compromise home security
- Lead to frequent breakdowns or jamming
- Increase the risk of break-ins
- Shorten the lifespan of the lock
Proper lock installation ensures that the mechanism works seamlessly, doors close tightly, and the lock resists tampering.
Types of Locks Homeowners Should Know
Before starting lock installation, it is important to understand the types of locks available for residential doors.
1. Deadbolts
- Single-cylinder deadbolt: Operates with a key on the outside and a thumb turn on the inside.
- Double-cylinder deadbolt: Requires a key on both sides, offering extra security but may pose a fire safety risk.
2. Knob Locks
Common in interior doors but not recommended as the primary entry security because they can be easily bypassed.
3. Lever Handle Locks
User-friendly, often found in interior doors, and suitable for people with accessibility needs.
4. Mortise Locks
Installed inside a pocket within the door, offering higher durability and strength.
5. Electronic and Smart Locks
Operate with keypads, biometric scanners, or mobile apps. They offer convenience and advanced security features but may require more maintenance.
Tools and Materials Needed for Lock Installation
Having the right tools makes the lock installation process smoother.
- Power drill and drill bits
- Screwdriver set (flathead and Phillips)
- Tape measure
- Chisel and hammer
- Hole saw kit (if installing a new lockset)
- Pencil for marking
- Screws (usually included with lockset)
- The lockset of your choice
Step-by-Step Guide to Lock Installation
Part 1: Pre-Installation Planning & Choosing Your Lock
Before you pick up a screwdriver, you need to select the right lock for your door.
1. Understand the Types:
-
Knob Locks: Often used in conjunction with deadbolts. Never use a knob lo
-
Deadbolt Locks: The gold standard for exterior doors. Look for a single-cylinder deadbolt (key outside, thumbturn inside) for most homes. For doors with glass, a double-cylinder deadbolt (key required on both sides) is safer but check local fire codes, as they can be an escape hazard.
-
Lever Handle Locks: Ideal for accessibility (e.g., for elderly family members) but generally not as secure as deadbolts for main entrances.
-
Smart Locks: Offer keyless entry, remote access, and user codes. They typically replace the interior side of a deadbolt but use the existing exterior cylinder and bolt.
2. Check the Backset and Crossbore:
This is the most critical step for a successful lock installation.
-
Backset: The distance from the edge of the door to the center of the knob/deadbolt hole. The standard sizes are 2-3/8″ or 2-3/4″. Use a tape measure to determine your door’s backset.
-
Crossbore: The large hole where the knob/lever is inserted. The standard diameter is 2-1/8″.
3. Measure the Door Thickness:
Most residential doors are 1-3/8″ or 1-3/4″ thick. Ensure your new lock is designed for your door’s thickness.
4. Grade Matters:
Locks are graded by the American National Standards Institute (ANSI).
-
Grade 1: Highest security, commercial grade. Best for exterior doors.
-
Grade 2: Heavy-duty residential security. An excellent choice for homeowners.
-
Grade 3: Basic residential security. Better suited for interior doors.
Pro Tip: Invest in a Grade 2 or Grade 1 deadbolt with a 1-inch throw bolt made of hardened steel for the best security.
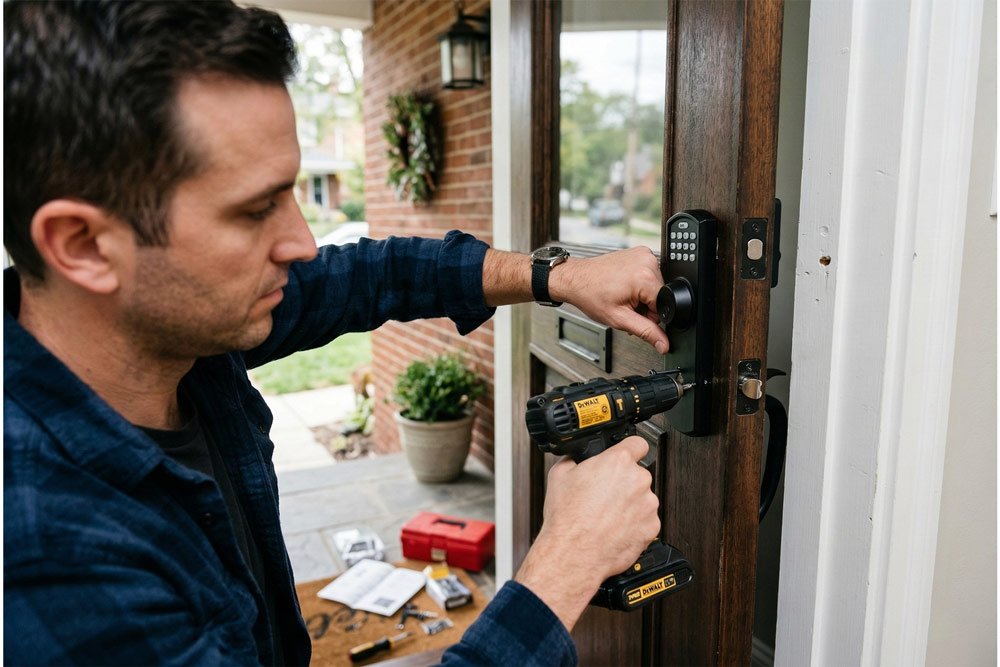
Part 2: The Step-by-Step Lock Installation Guide
A. Installing a New Deadbolt in a Pre-Drilled Door
Most new doors come pre-drilled for standard locks. If yours is, the process is straightforward.
- Insert the Deadbolt: From the outside of the door, push the deadbolt assembly through the large bore hole.
- Attach the Interior Plate: From the inside, place the interior plate over the bolt mechanism. It should align with the screw holes.
- Connect the Thumb Turn (or Key Cylinder): Slide the thumb turn (for single-cylinder) or key cylinder (for double-cylinder) into place on the interior side, ensuring it engages with the deadbolt mechanism.
- Secure the Assembly: Use the provided long screws to connect the interior and exterior plates tightly through the door. Don’t overtighten, as this can bind the mechanism.
- Install the Strike Plate: Close the door and mark where the deadbolt tongue meets the door jamb. Use the provided strike plate as a template to mark the area you need to chisel out. Chisel a recess so the plate sits flush with the jamb. Secure it with the short screws first.
- Reinforce the Strike Plate (CRUCIAL STEP): Remove the short screws and replace them with long 3-inch screws that will penetrate past the door jamb and into the solid wall stud. This is the single most important upgrade for door security.
- B. Installing a Lock on a Door Without Pre-Drilled Holes
This is more advanced but entirely achievable.
Use the Template: The new lockset will include a paper or cardboard template. Tape it precisely to the edge of the door according to the manufacturer’s instructions.
Drill the Cross Bore: Using a hole saw of the specified size (usually 2 1/8″), drill the main large hole through the face of the door where the template indicates. Use masking tape on the bit to mark the depth and prevent splintering. Drill halfway from one side, then finish from the other side for a clean hole.
Drill the Edge Bore: On the edge of the door, use a spade bit (usually 1″) to drill the hole for the deadbolt mechanism. This hole must intersect perfectly with the cross bore you just made.
Chisel the Recess: Place the faceplate on the edge of the door and trace its outline. Use a chisel and hammer to carve out a recess deep enough for the plate to sit perfectly flush with the door edge.
Follow Steps 1-6 from the pre-drilled door section above to complete the assembly.
Test the Lock: Once everything is installed, test the lock multiple times with the door open to ensure it throws and retracts smoothly. Then test it with the door closed.
Part 3: Essential Lock Maintenance for Longevity
A proper lock installation is only half the battle. Regular maintenance keeps your locks functioning like new and prevents costly emergencies.
- Clean Regularly: Every few months, spray a dry graphite lubricant or a Teflon-based lubricant into the keyhole and the bolt mechanism. Avoid oil-based lubricants like WD-40, as they attract dust and grime over time, leading to a gummy, stuck lock.
- Tighten Screws: The screws on your lock plates and handles can loosen with repeated use. Check them every six months and tighten them gently.
- Check Alignment: If your lock becomes hard to turn, the door may have sagged. Check the alignment of the deadbolt and the strike plate hole. You may need to adjust the strike plate by slightly enlarging the hole or chiseling a new recess.
- Inspect for Wear: Look for signs of rust, wear on the key, or difficulty turning. Address these issues early before they lead to a complete failure.
- Re-key When Needed: If you lose a key or someone who had a key (like a former tenant or contractor) should no longer have access, don’t replace the whole lock. Instead, call a locksmith to re-key the existing lock, rendering the old keys useless. It’s faster and cheaper than a full lock installation.
Common Mistakes in Lock Installation
- Misaligned holes causing the latch not to fit properly
- Using short screws, which make the lock easier to kick in
- Forgetting to check door swing before installation
- Overtightening screws, which can strip threads
- Ignoring manufacturer instructions
Lock Maintenance Tips for Longevity and Security
A proper lock installation is only half the battle. Regular maintenance keeps your locks functioning like new and prevents costly emergencies.
- Clean Regularly: Every few months, spray a dry graphite lubricant or a Teflon-based lubricant into the keyhole and the bolt mechanism. Avoid oil-based lubricants like WD-40, as they attract dust and grime over time, leading to a gummy, stuck lock.
- Tighten Screws: The screws on your lock plates and handles can loosen with repeated use. Check them every six months and tighten them gently.
- Check Alignment: If your lock becomes hard to turn, the door may have sagged. Check the alignment of the deadbolt and the strike plate hole. You may need to adjust the strike plate by slightly enlarging the hole or chiseling a new recess.
- Inspect for Wear: Look for signs of rust, wear on the key, or difficulty turning. Address these issues early before they lead to a complete failure.
- Re-key When Needed: If you lose a key or someone who had a key (like a former tenant or contractor) should no longer have access, don’t replace the whole lock. Instead, call a locksmith to re-key the existing lock, rendering the old keys useless. It’s faster and cheaper than a full lock installation.
Common Lock Problems and Troubleshooting
- Key Won’t Turn: Lubricate or replace the lock.
- Lock Jamming: Check for debris or misalignment.
- Loose Lock: Tighten screws or replace faulty parts.
- Misaligned Strike Plate: Adjust position for proper engagement.
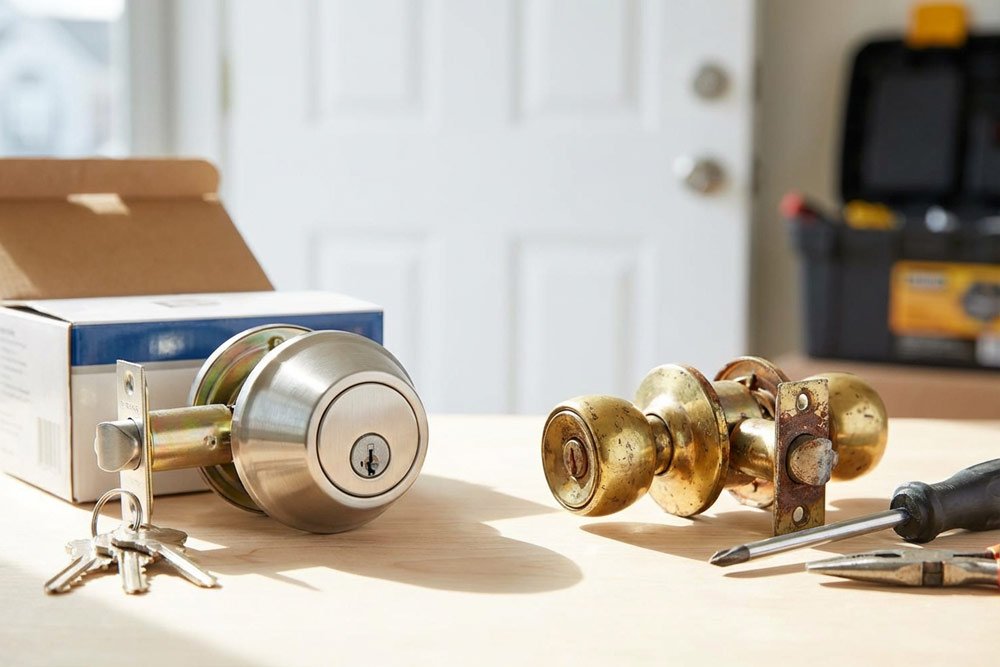
When to Replace or Upgrade Your Locks
Sometimes maintenance is not enough, and replacement is the better option. Consider replacing locks if:
- Keys are lost or stolen
- You move into a new home
- The lock shows signs of rust or wear
- The lock mechanism jams frequently
- You want to upgrade to smart lock technology
Professional vs DIY Lock Installation
DIY Installation
- Cost-effective if you have tools and skills
- Convenient for standard locks
- May be challenging for mortise or smart locks
- Professional Installation
- Ensures precise fitting and maximum security
- Saves time and avoids mistakes
- Often includes warranty and expert advice
When to Call a Professional Locksmith
- While DIY lock installation is rewarding, some situations require a pro:
- You’re installing a lock on a high-security door or a commercial property.
- The door or frame is metal or requires complex modifications.
- You’ve attempted the installation and the mechanism isn’t working correctly.
- You’re dealing with a sophisticated smart lock system integrated with a home security network.
By following this guide, you can confidently approach your next lock installation project, ensuring your home remains secure, functional, and well-maintained for years to come. Remember, security is an investment—start with a strong lock.
Security Tips Beyond Lock Installation
- Install a peephole or video doorbell for added safety
- Reinforce door frames with strike plate reinforcers
- Use smart locks with activity monitoring
- Combine locks with a home security system
Conclusion
Lock installation is more than a simple DIY project, it is a crucial step in protecting your home and loved ones. With the right tools, step-by-step guidance, and ongoing maintenance, homeowners can ensure their locks remain strong, durable, and reliable. Whether you choose to do it yourself or hire a professional, at one minute locksmith services proper lock installation paired with regular care will give you long-lasting peace of mind.